You don’t need HDMI to connect nintendo switch to your tv anymore. Most homes in 2025 feature DVI, DisplayPort, USB, SCART, and even coaxial options. This guide shows you how to use AUX, DVI adapters, composite cables, and USB-C for easy setup. You’ll learn which method fits your tv and how to handle audio, so you can start gaming fast.
Key Takeaways
You can link your Nintendo Switch to a TV without HDMI. Use AUX, DVI, or composite cables. Pick the cable that matches your TV ports.
DVI does not send sound. Use AUX or RCA cables for audio. This helps you hear the game while you play.
Wireless adapters like Miracast and Chromecast work without cables. You can play games on your TV this way. Make sure both devices use the same Wi-Fi. This keeps the connection steady.
If you have trouble connecting, restart your console. Check all cables to see if they work. Switching cables can fix some problems.
Always check if your adapter works with your device. Look for updates, especially with new models like Nintendo Switch 2. This helps stop display problems.
Connect Nintendo Switch Using AUX, DVI, and Composite
AUX Port Connection Guide
You might notice an AUX port on your tv or sound system. This port lets you send audio from your Nintendo Switch to your speakers. You need a 3.5mm AUX cable for this setup. Plug one end into the headphone jack on your Switch. Put the other end into the AUX input on your tv or speaker.
Tip: Some tvs only use AUX for audio, not video. You still need another method for the picture.
If you want to connect nintendo switch for both sound and video, combine AUX with another video connection like DVI or composite. This guide helps you get clear sound while you play.
DVI Adapter Setup
DVI ports show up on many older and even some newer tvs. DVI gives you a sharp picture, but it does not carry sound. You need a USB-C to DVI adapter to link your Switch to the tv. Plug the adapter into your Switch, then connect a DVI cable from the adapter to the tv.
Here’s a quick setup checklist:
Get a USB-C to DVI adapter.
Connect the adapter to your Switch.
Attach the DVI cable to the adapter and tv.
Use RCA cables or AUX for audio.
Note: DVI does not transmit audio. You must use RCA or AUX cables for sound. Many users find this step tricky, so double-check your connections.
DVI works well for video, but you need extra cables for sound. This method lets you connect nintendo switch to a tv with a DVI port, but remember to set up your audio.
Composite Cable Method
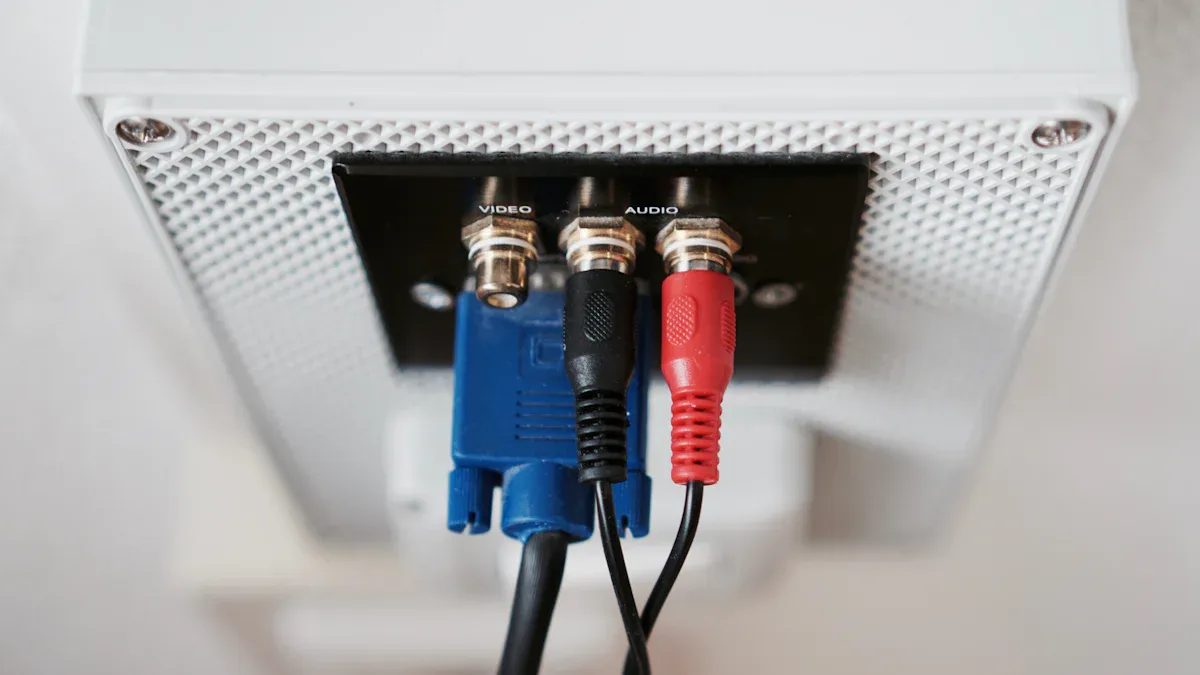
Composite cables look old-school, but they still work with many tvs. You need a USB-C to AV adapter for this setup. Plug the adapter into your Switch, then use the yellow, red, and white cables to connect to the tv.
Cable Color | Function |
Yellow | Video |
Red | Audio (Right) |
White | Audio (Left) |
Composite connections send both video and audio, but the sound quality may not match HDMI or AUX. You might notice lower audio quality or fewer options for sound output.
Heads up: Composite cables can limit your audio choices. Some tvs only support mono sound, so check your tv’s manual.
This method works best if your tv does not have HDMI or DVI. The setup is simple, and you can start gaming quickly.
You have several ways to connect nintendo switch to a tv without HDMI. Each setup has its own steps and audio challenges. Use this guide to pick the best method for your tv and enjoy your games with the right sound and picture.
USB-C to HDMI and Other Adapters Without the Dock
Step-by-Step Connection Guide
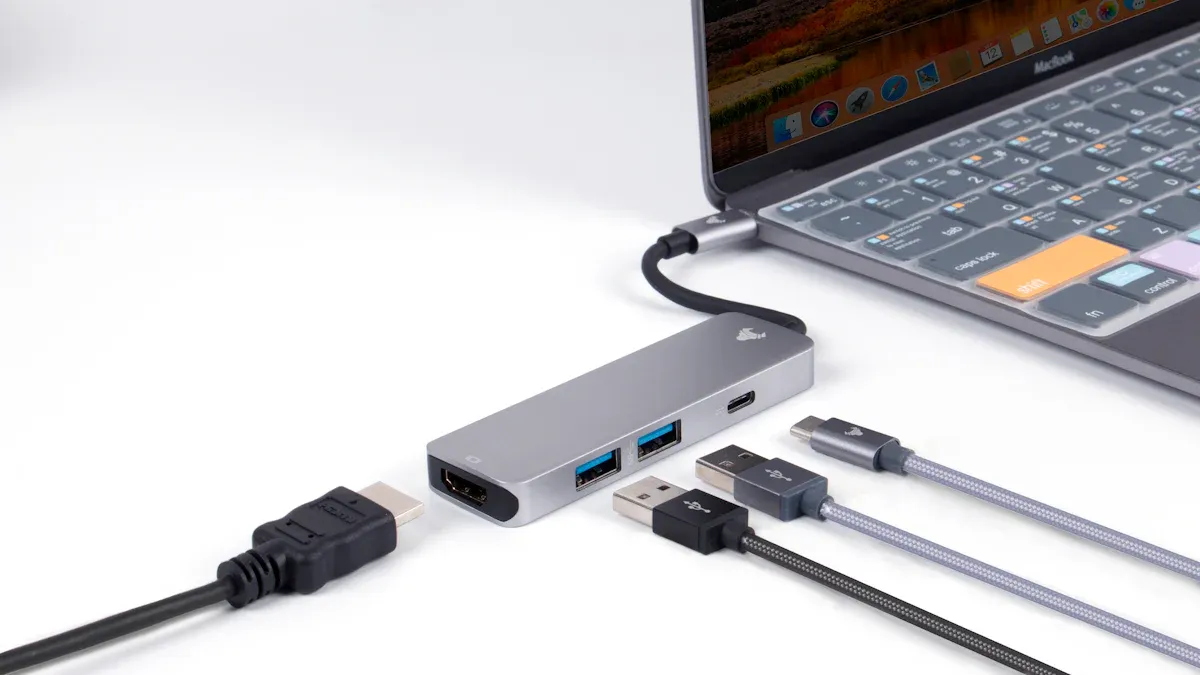
You want to connect nintendo switch to your tv, but you don’t want to use the dock. You can do this with a USB-C to HDMI adapter. This method works well if you lost your dock or just want a simple setup.
Here’s a step-by-step connection guide to help you get started:
Turn off your Nintendo Switch.
Plug the USB-C to HDMI adapter into the USB-C port on your Switch.
Connect an HDMI cable from the adapter to your tv.
If your adapter has a power port, plug in your Switch charger for extra power.
Turn on your tv and select the correct HDMI input.
Power on your Switch. You should see the screen on your tv.
Tip: Some adapters need a firmware update to work with the latest Switch models. If your screen stays black, check the adapter’s website for updates.
If you use a third-party adapter, you might run into problems. The Nintendo Switch 2 uses a new USB-C chip. Some adapters can’t handle the new encryption and power rules. This can stop video output or even cause problems with your console. Always use trusted brands and check for Switch compatibility.
Adapter Compatibility and Tips
Not all adapters work the same way. You need to check a few things before you buy one. Here’s a table to help you pick the right adapter for your setup:
Compatibility Factor | Description |
USB Standard Support | Use USB-C cables that support USB 3.2 Gen 2 or higher for optimal performance. |
Power Delivery Capability | Ensure the adapter supports Power Delivery (PD) of at least 60W for fast charging. |
Durable Construction | Look for cables with reinforced connectors to prevent wear and tear. |
DisplayPort Alternate Mode Compatibility | Check for compatibility with DisplayPort Alternate Mode when connected to the docking station. |
You may need to update your adapter’s firmware if you have a Switch 2. Here’s how you do it:
Connect the PD port of the adapter to a Windows PC using a USB-A to USB-C or USB-C to USB-C cable.
Download the correct firmware (4K60Hz or 4K144Hz).
Open the folder and run the .exe update tool.
When the progress bar turns green, the update is complete.
Reconnect to your Switch 2 — video output should work normally.
The firmware update is important. Nintendo’s Version 21.0.0 update changed how the Switch talks to adapters. If you skip this step, your adapter might not show anything on your tv.
Note: Using adapters without the dock is handy, but always check for updates and use quality cables. Cheap or old adapters can cause display issues or even damage your console.
You can connect nintendo switch to your tv without the dock if you follow these tips. Always check compatibility and keep your gear updated for the best gaming experience.
Wireless Display Guide
Wireless Adapter Setup
You want to play Nintendo Switch games on your tv without any cables. Wireless display adapters like Miracast and Chromecast make this possible. These devices let you send the Switch’s screen to your tv over Wi-Fi. You just need a wireless adapter plugged into your tv’s HDMI port.
Here’s how you set up a wireless adapter:
Plug the wireless adapter into your tv’s HDMI port.
Connect the adapter to your home Wi-Fi network.
On your Switch, go to the settings and look for the “Screen Mirroring” option.
Select your adapter from the list of available devices.
Confirm the connection and wait for your tv to show the Switch screen.
Tip: Make sure your Switch and adapter use the same Wi-Fi network. This helps keep the connection stable.
Some adapters work better than others. Miracast is easy to use and works with most modern tvs. Chromecast needs the Google Home app for setup, but it offers extra features like streaming from your phone.
Performance and Limitations
Wireless connections can feel magical, but they have some limits. You might notice a slight delay between your controller and what you see on the tv. This is called input lag. You can reduce lag by following these best practices:
Use a high-quality HDMI cable for the adapter.
Set your Switch’s resolution to 1080p and output to 60Hz.
Update your Switch and tv firmware often.
Use a wired controller or keep your Bluetooth connection strong.
Turn on “Low Latency Mode” in your tv settings.
Keep other wireless devices away from your gaming area.
Wireless Adapter | Setup Difficulty | Input Lag | Audio Support | Extra Features |
Miracast | Easy | Low | Yes | Basic |
Chromecast | Medium | Medium | Yes | Streaming Apps |
Wireless adapters work well for casual gaming and sharing your screen. If you play fast-paced games, you might prefer a wired connection for less lag. Always check your tv’s manual for extra settings that can improve your experience.
Troubleshooting and Performance Tips
Fixing Connection Issues
Sometimes, things just don’t work as planned. If you can’t get sound or picture from your Nintendo Switch, don’t worry. You can try these steps to fix audio problems:
Restart your console. Hold the Power button for three seconds, then pick Restart.
Check your volume. Use the volume buttons and make sure ‘Mute when headphones are disconnected’ is off.
Try headphones. Plug them in and out to see if the problem is with the audio output.
If you hear sound in handheld mode but not on your tv, check your cables and make sure everything is plugged in tight.
Update your system. Go to System Settings, then System, and select System Update.
Look for dirt or damage in the headphone jack or speaker area.
If you still have trouble, try a different cable or adapter. Sometimes, a simple swap solves the problem.
Optimizing Display Quality
You want your games to look sharp and run smooth. Picking the right adapter and cable makes a big difference. Here are some top choices for a great display:
Yuanshan 4K60Hz USB-C to HDMI Cable Mini Dock with PD 100W: This adapter gives you clear 4K video and fast charging. It’s light and easy to use. You don’t need to worry about tricky hardware setups.
Use USB-C cables that support USB 3.2 Gen 2 or higher. These cables help your games look their best.
Make sure your tv is set to the right input and resolution. Set your Switch to 1080p or 4K if your tv supports it.
Tip: Keep your cables short and avoid tangles. Long or twisted cables can cause lag or lower picture quality.
If you notice lag or blurry images, try switching to a different port or lowering the resolution. Clean your ports and cables often. This helps keep your setup working well for every game night.
You have lots of choices for connecting your Nintendo Switch to a tv without HDMI. Some people like USB-C to HDMI adapters, but you should check if they need extra power or updates. Others use active converters for older screens. You can also try third-party solutions, but always make sure they work with your setup.
Before you start, look at your tv’s ports and think about sound. Pick the method that fits your gaming style and keeps everything running smoothly.
FAQ
Can I use my old TV with the Nintendo Switch if it doesn’t have HDMI?
Yes, you can. Try using a USB-C to composite or DVI adapter. Check your TV’s ports first. You might need extra cables for sound. Always read your TV’s manual for setup tips.
Do I need special cables for audio when using DVI or composite?
You do. DVI only sends video, so grab an AUX or RCA cable for sound. Composite cables send both, but the audio quality might drop. Test your setup before you start gaming.
Will wireless adapters work for fast-paced games?
Wireless adapters can show some lag. You might notice a delay in action games. Wired connections give you smoother gameplay. Use wireless for casual play or sharing your screen.
What should I do if my adapter doesn’t show anything on the TV?
First, check all connections. Try a different cable or port. Update your adapter’s firmware if possible. Restart your Switch and TV. If nothing works, look for a compatible adapter.
Can I charge my Switch while it’s connected to the TV without the dock?
Yes, you can. Many USB-C adapters have a power port. Plug in your Switch charger for extra power. This keeps your console charged while you play on the big screen.